Showing posts with label halloween. Show all posts

Saturday, October 20, 2012

Halloween Costumes! Brave's Merida (and Baby Bear) Costume using free patterns


 I have to admit, when I learned there was a new Disney movie featuring a Scottish princess with red curly hair, I started a not-so-subtle campaign for this year's Halloween costume.  Even before we saw Brave, I'd started planting seeds.  And after we saw it (even though it was pretty scary for a three year old!), Hannah and I sealed the deal: she would be Merida for Halloween.  It was actually Hannah's idea that Lydia be a bear, just like Merida's little brothers.  That sounded cute as could be, so I searched to the ends of Pinterest, and this is what I found.


So here, for you, are several free online patterns and tutorials needed to create a Merida costume, complete with a red hair garland, and a coordinating little sis/(bro) bear.

I started off with the dress, using the pattern found here (rostitchery.com's Magistrate Dress pattern), via ikatbat.com, here.  I added some gold trim, including an inset of gathered gold fabric at the neckline.


Next came outerwear.  Not only does Merida wear a cape in the movie, but I distinctly remember last year, pinning Hannah's butterfly wings to the back of her winter coat because it was so cold.  Although practical, it was not as lovely as I intended when I sewed the costume.  So this year, I wised up and made something warm for her to wear.  I used the free Red Riding Hood Cape pattern found here, at fleecefun.com.  There are instructions for lining the hood, but I lined the entire fleece cape with flannel, both for added warmth and to add a little color.


Finally, what would a Merida costume be without red hair, and lots of it?  I looked at tutorials for full wigs, and even found one that explained how to curl the yarn by heating it in the oven.  I finally decided to make a red version of mmmcrafts.blogspot.com's Rapunzel hair recipe, found  here.  Hannah said, "This isn't like Merida's hair...it's not big enough."  However, she can put it on and off by herself, which I think will be handy when this becomes part of the dress-up box after Halloween.


And because Grandma's are cool like this, Hannah's Grandma got her the official Merida bow and arrows from the Disney Store.  Very cool.  Hannah spent a good fifteen minutes trying to string the bow before she gave up and started throwing them across the yard.


For Lydia's bear costume, I decided to keep it simple - mostly because I wasn't sure whether she would wear it or not.  She wasn't going to until she saw Hannah had a cape too, and then she was ready to go!  The cape is made from the same pattern at fleecefun.com, although I printed the pattern at 75% to make it toddler-sized.  Hers is also fleece, lined with matching flannel. 

The ears are from another pattern at fleecefun.com, and are a part of their Halloween Bear Hat, found here.  I cut slits in the top of the hood, and stitched the ears in before I added the lining. 


So here they are...Princess Merida and her bear sis.


 Ready for some serious archery.


And doing a happy little Halloween dance.

Monday, October 31, 2011

Halloween


When I was a kid, my mom painstakingly stitched all of my Halloween costumes, and I loved them.  So it matters to me that the girls have their own little labors of love.  My mom always searched through pattern books, finding just the right costume, and spent weekends at the kitchen table with her sewing machine.  I don't know how she found the patience, especially when I think about how my favorite thing to do was pick up pins with a magnet, which always ended up with the whole box of pins spewed over the kitchen floor.  (Plus if you magnet-ed them enough, they would stick to each other, which I thought was awesome, but I can see now was probably endlessly annoying to my mom.  So far, Hannah is forbidden to touch my pins, even though she has a familiar manic gleam in her eye when she spies them.)

I'm trying to get as much mileage out of girly-girl and matching outfits, while neither girl has too much of a say.  So my little love bugs dressed as insects this year: Hannah was a butterfly, and Lydia a ladybug.  I thought about both girls having wire wings, but finally decided that there was nothing Hannah would like better than to flap her own wings.  I was right (wait and see for yourself...).  But for Lydia, I fashioned a tiny pair of wings from a coat hanger and half a pair of knee-high stockings.

A tulle tutu finished the look. 


Who knew, but the wings double as a super-cool pair of giant sunglasses.

And here are the flappable wings!  Ever practical, they're attached to a long sleeve leotard.  Also, recognize this tutu from a Halloween past?


Paired with some pink patent boots, she could almost be a new hybrid ballet superhero.
Hannah picked the sequined trim herself.  I have to admit, she has good taste.  It totally made the outfit.  And there was exactly enough left over to make a headband.

On a kid this cute (when she was one, Hannah won a costume contest by sheer force of personality, not because her costume was anything special), you can imagine the candy haul she came home with tonight!

Friday, October 28, 2011

Pumpkin Shirts

Yesterday morning, the girls and I met friends to play. While the kiddos were swarming over the play equipment, my friend said, "Oh, look at that girl's cute appliqued pumpkin shirt." Little did she know that she sparked some kind of dormant pumpkin mania deep within me, which caused me to stop at the fabric store on the way home and crank out knock-off pumpkin shirts before supper.


I started with white shirts from the thrift store. This is why the shirts are so different from each other. They are also not ideal for a pattern (turtleneck and a pocket), but that's what I found, and they cost me a grand total of $1.30. So...two white shirts.


Next, I found some pumpkin clip art, which I enlarged for the baby shirt and enlarged some more for the toddler shirt. I transferred the outline to fusible web...


...which I attached to orange polka dot fabric. I also drew some stems freehand and cut those from some brown polka dot fabric.


So here are all my pieces, including some extra-large green rickrack for the vines. (Hannah got a real kick when she learned we were buying something called "rickrack." That was funny enough to keep her entertained while we were waiting at the cutting counter.)


I fused the fabric to the shirts, then stitched over the edges. In retrospect, there should have been some stabilizer under these, but good enough is good enough.


For the finishing touch, I added some buttons from my stash.


And voila...here are some cute pumpkin shirts for my little pumpkins to wear. (Too bad I didn't get obsessed with these before we went to the pumpkin patch, huh? That would have been super cute.)

Wednesday, October 26, 2011

Pumpkins

We're having a ball this fall with all things pumpkin.

First, check out these jack-o-lantern fruit cups we brought to our Halloween party. There were so easy to make, and super cute. The kids loved them!

I made them by cutting the tops off of oranges (it helped to first find the end of the orange that sat best of the table, then cut off the opposite end). Next, I cut out most of the orange with a knife. I didn't worry about scooping out all the pulp, just enough to make a cup. Then I chopped the removed orange, added some other fruit, and filled them back up. The faces were drawn on with permanent marker. This was actually the hardest part because the oranges weren't completely dry. So some of them are augmented with a regular ball point pen.


And we made our now-annual visit to the pumpkin patch. (This time we drove instead of hiked...uh...walked.)


These girls are just so stinking cute!


Wednesday, September 22, 2010

Abby Costume Tutorial - Just in time for Halloween


As I mentioned before, we try to keep TV to a minimum at our house (at least while Hannah's awake), and her one viewing hour a day is usually Sesame Street. She LOVES Abby. I mean, loves her, as only an almost-two-year-old can. Hannah's Abby doll goes everywhere with us, from the grocery store to the doctor's office to church. We decided that Hannah's upcoming birthday party should be Abby-themed, and then decided to do one better and keep the fun going for Halloween in four more weeks.

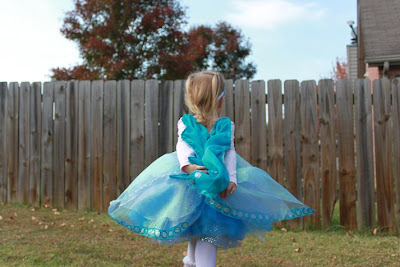
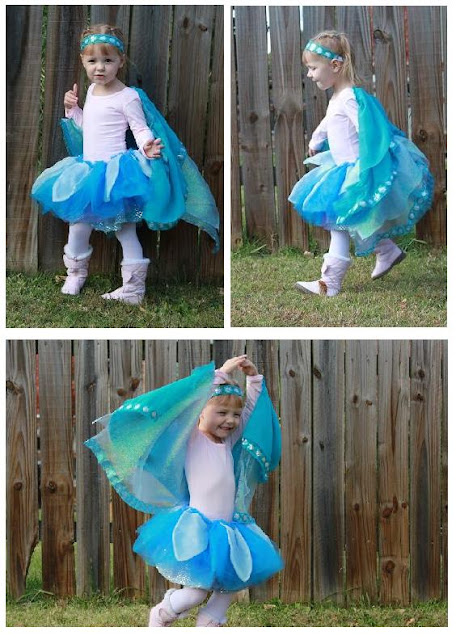
So being me, I decided to make her an Abby costume. It's really just a glorified tutu, but it is rather pretty. I finished it while Hannah was napping, and put in on the couch beside beloved Abby doll. When Hannah saw it, she lit up like a thousand-watt bulb and said, "It just like the same! Hannah have just like the same as Abby!" It was pretty cute.

So I wanted to share with you how to make the skirt. Like I said, it is really a tutu with some extra "petals," but I searched to the end of the Internet and couldn't find another tutorial for an Abby costume, so I thought I'd add this to cyberspace. This is the first tutorial I've ever written, so I hope it make sense. If not, please let me know, and I'll try to explain things better.

One note about the pictures: I didn't take any while I was sewing the actual skirt, so these pictures are of different fabric, which I didn't actually sew together. I hope the changes in colors aren't too confusing.


Materials:
  1. 1/2 yard of sparkle fabric (if you were in a hurry, or on a budget, you could omit this layer, but as you'll see later, it makes for a nice, reversible skirt)
  2. one yard of purple tulle (you could also use pink)
  3. two yards of blue tulle
  4. 1/2yard of chiffon-ish blue fabric for the petals
  5. 1/2 inch no-roll elastic, cut to 2 inches longer than your child's waist
The first layer is the sparkle material. This takes two steps to hem (and this is the most complicated part). First, make a narrow hem on the bottom of each long edge. (Note: I didn't hem the bottom of my original fabric because it doesn't fray. As you can see, the fabric in this picture is already fraying, so I would hem this.) Second, fold the fabric lengthwise, RIGHT sides together. Sew the short sides together, making the fabric into a tube. Press, if it's the kind of fabric that can be pressed. (Don't melt your sparkles!) Turn it right side out, then fold the skirt in half lengthwise with the right sides facing out.

I used two layers of tulle. This was mostly because I bought the fabric for this project on sale in July, when the whole idea of Halloween was just a fuzzy notion, and I was standing in the fabric shop at 9 PM trying to remember what Abby looked like. So I came home with one yard of purple tulle and two yard so blue tulle. It came out like this:

First, fold the purple tulle in half lengthwise, being careful to match the long edges (good luck!) Next, fold this unit into thirds. This will give you six layers of tulle. Being careful to match all the top edges, pin the top of the tulle to the top (folded) edge of the sparkle fabric.


The blue tulle is done in much the same way. Fold it in half lengthwise, and then fold that into thirds, giving you six layers. Since you have two yards of blue, you have to gather it to make it fit. I made sort of pin tucks across the top of the skirt (along the fold of the sparkle fabric). As you can see from all the pins, these were about every inch.


Now you have a three-layer skirt with a LOT of pins in it: first the sparkle fabric, then the purple tulle, then the gathered blue tulle. Sew the whole thing together one inch from the top of the skirt, leaving a two-inch part unfinished for the elastic. You now have a nice casing for the elastic.

So what makes this Abby-ish, rather than just a fun dress-up skirt (which it could also be, by the way) is the fairy petals. If you wanted to get fancier - and even more Abby - you could add a second row of pink petals on top. Like I said, 9 PM at the fabric store = only blue petals.

I drew a petal shape free-hand on stiff paper, then pinned it to the uncut fabric, which was folded in half lengthwise with the right sides together. Next, sew around the pattern, leaving an opening to turn the petal right side out. Then, cut it out, leaving a 1/4 inch seam. Turn right side out and press (again, don't melt it).


Pin the petals to the skirt at even intervals, and sew along your 1 inch hem. (Don't sew through the middle of the elastic casing.) I made seven petals out of my half yard of fabric, and used six of them on the skirt.


Last, measure your little one's waist, and cut a piece of elastic about 2 inches longer. Insert the elastic through the casing, using a safety pin fastened to the end to help pull it through, gather the extra fabric as you go. If you're going to be very nice and meticulous about this, you would sew a rectangle through both ends of the elastic to hold it together, and hand finish the gap in the seam. I am not this way. I'm a lazy mom who wants this skirt to last for a long time. So I made the elastic about 5 inches too long, pinned it to fit with the same safety pin I used to pull it through, and left the gap open. Now I can make the (slightly unfinished) skirt bigger as Hannah grows.

The skirt will gather nicely. Of course, Hannah's a little bitty thing. If you were making this skirt for an older child, it would not gather as much, but you could always add to the width.


And here it is again.


Lazy/resourceful mom trick number two (and you thought I was wasting fabric by using the good stuff on the inside of the skirt!). Turn it inside out, and you have a fun sparkle dress-up skirt that's filled with 12 layers of tulle. Go sparkle-mushroom-princess!


Related Posts Plugin for WordPress, Blogger...